FAQ Vencord Edition
Before starting
Before going or reading any further, make sure that you have installed C H I L L A X follwoing the instructions given in Installation Guide for Vencord.
1. How to change the background/background image of CHILLAX?
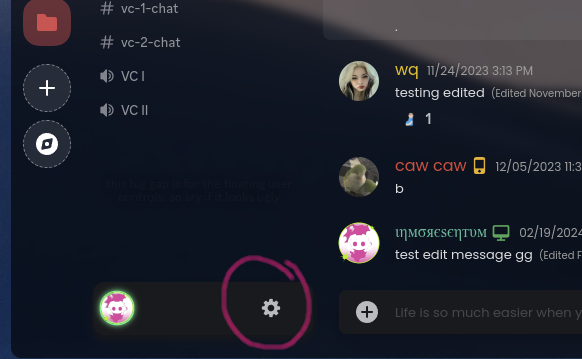
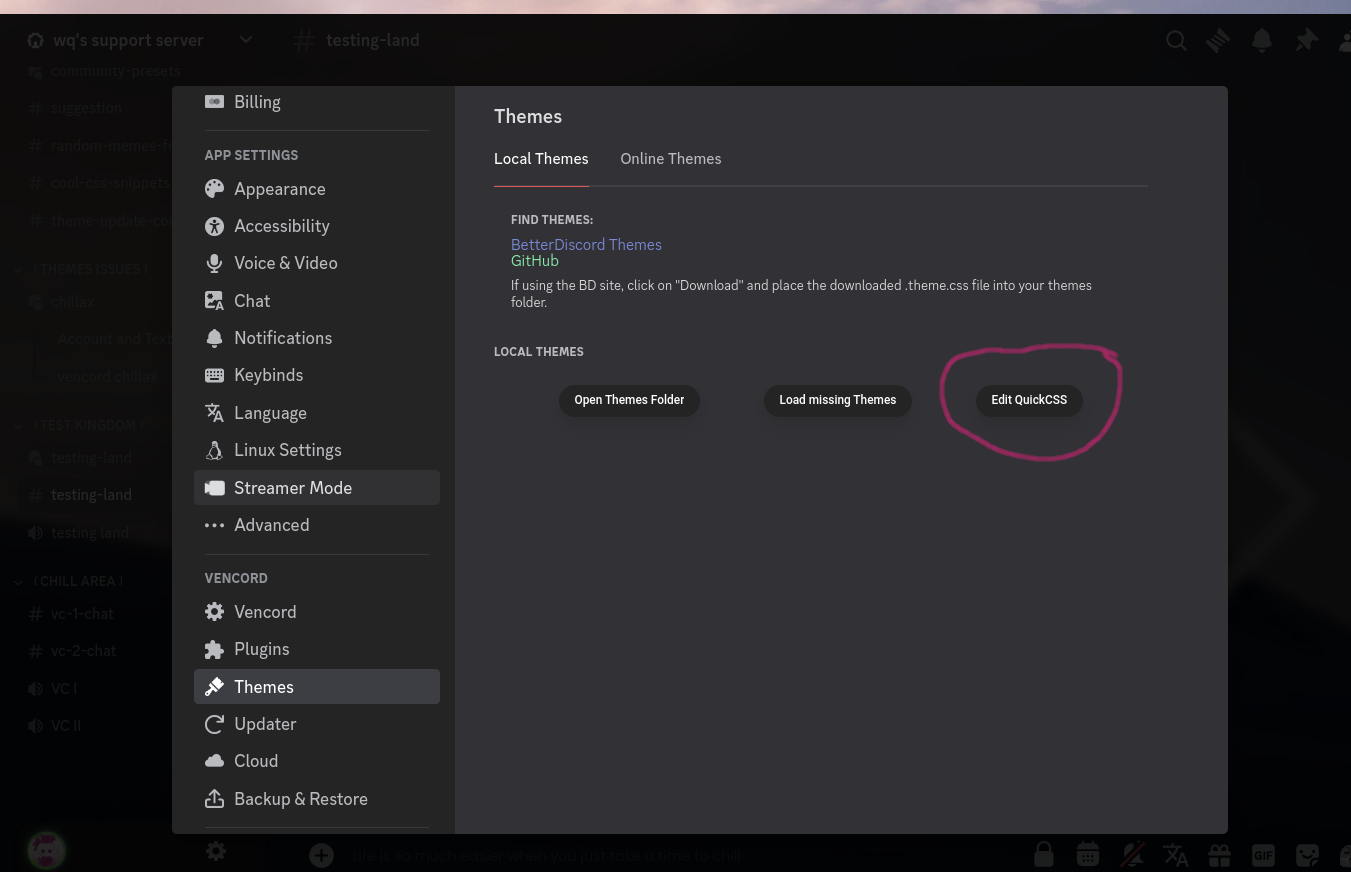
The steps are first settings, then go to the VENCORD Section and then Themes. Finally, click Edit Quick CSS which should open the integrated Monaco (It's already there no need for installation as this is part of the Vencord itself) code editor. Now using this Editor, you can easily edit CSS with hot reloading. See the below-attached screenshots:
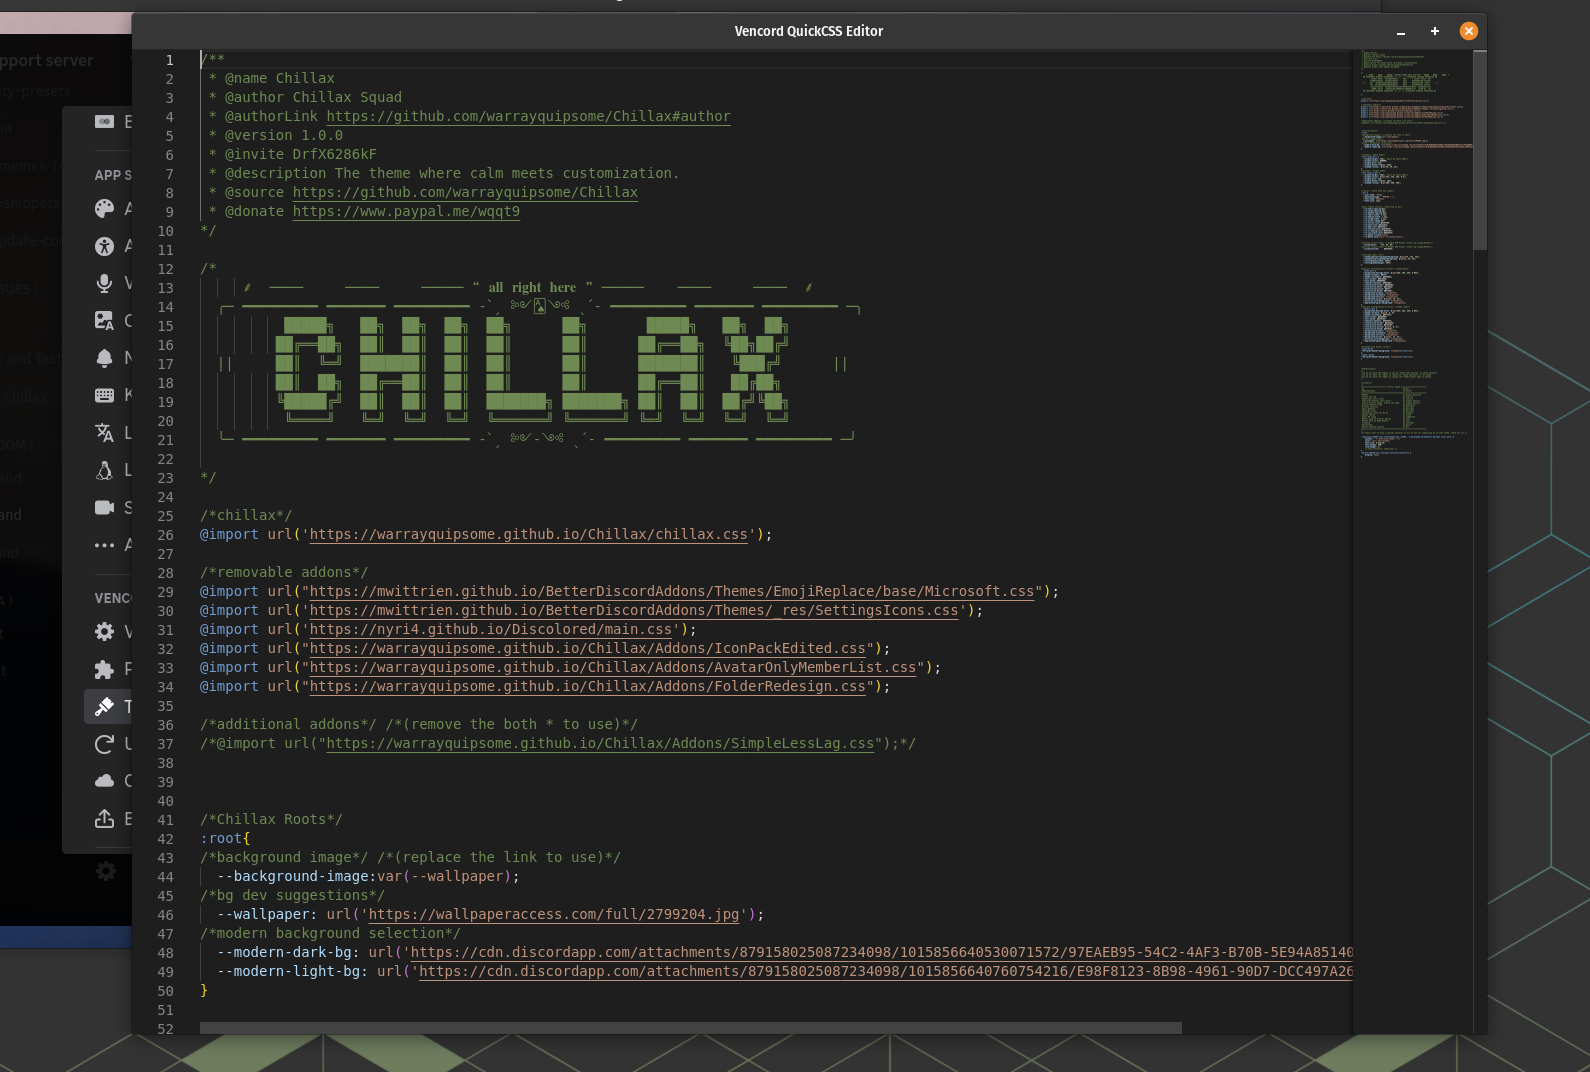
Now to go to line number 46 (at the time of writing, the line number is 46 which in a later version might change) or where the variable --wallpaper defined and change the url that is within the single quote "" to the wallpaper/gif cdn url that you want to set.
See the below screenshots:
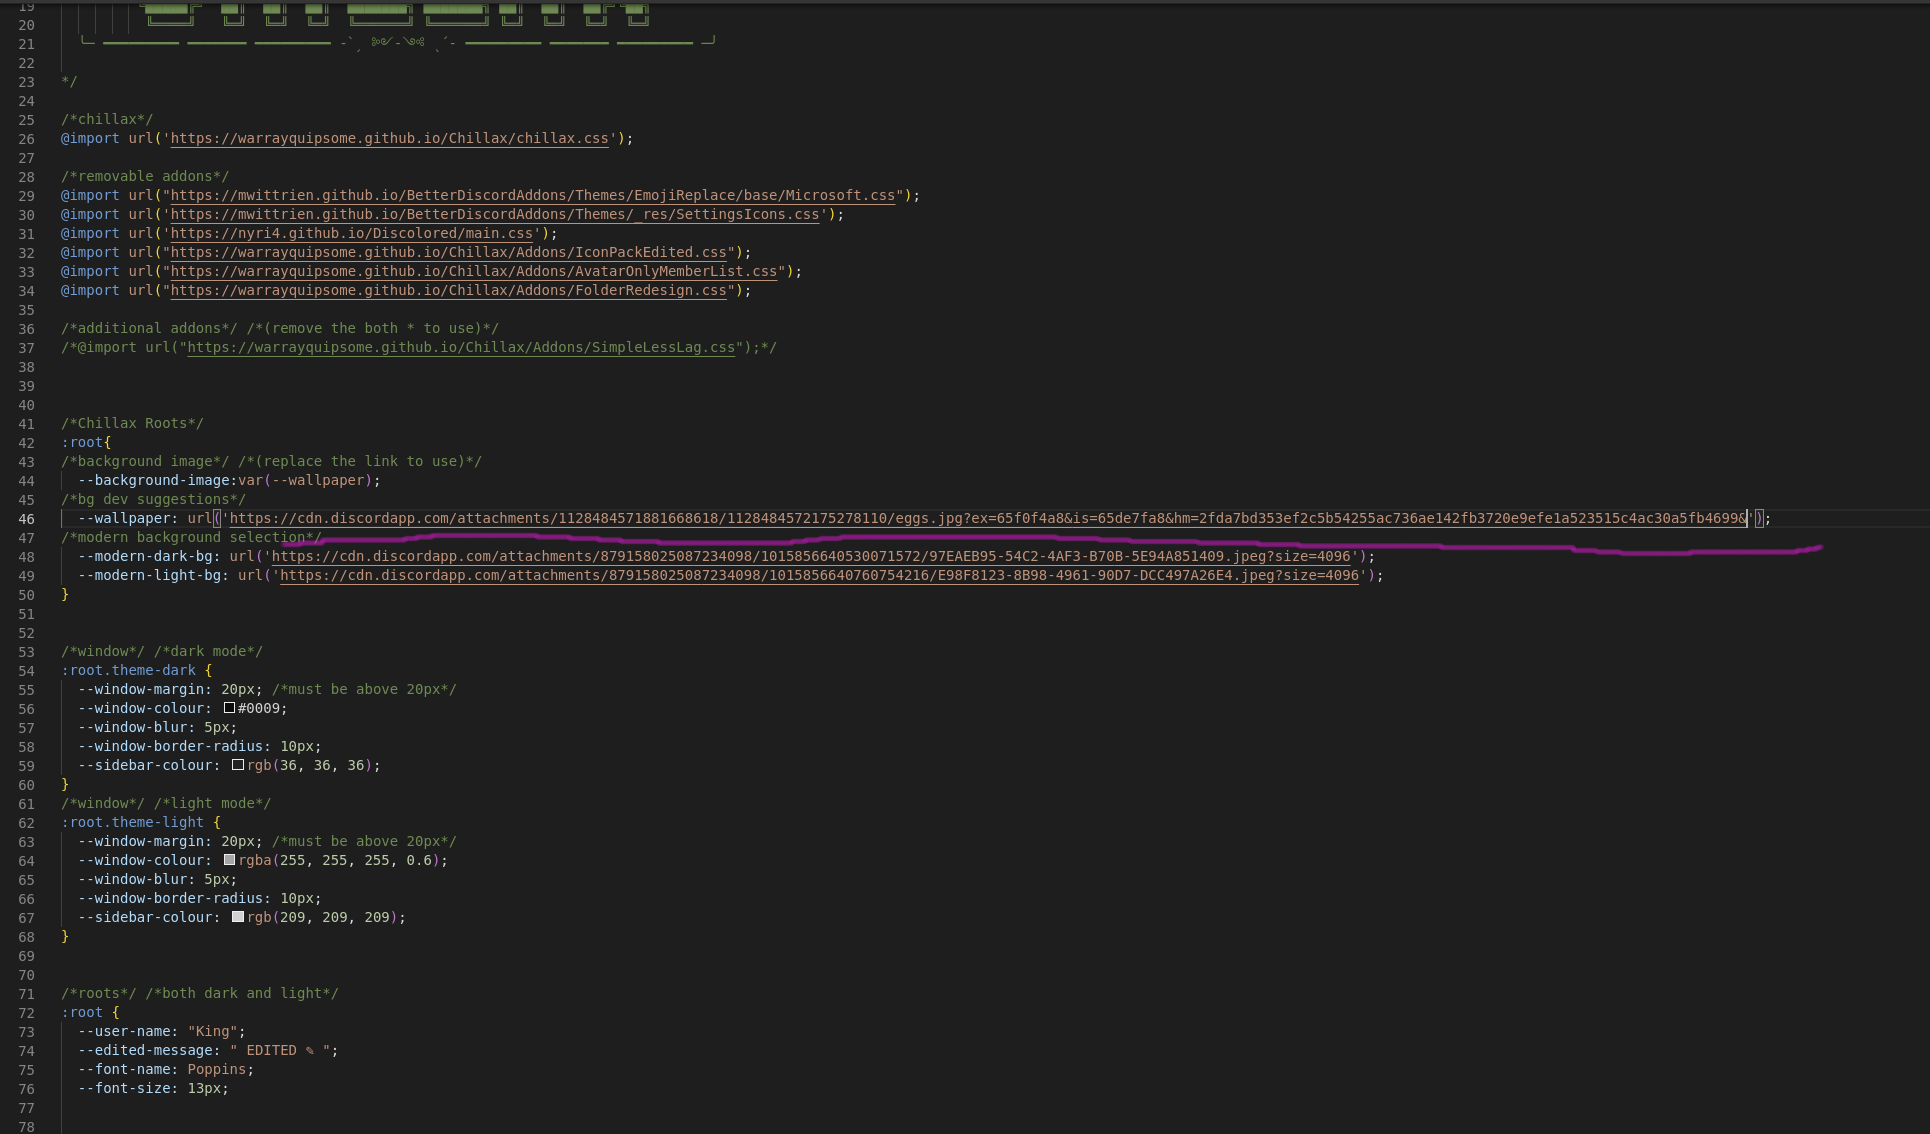
Now your favourite background image/gif should be applied. Moreover, if you need to control the opacity of the background, please adjust the CSS variable --bg-opacity.
Procedure to host images on GitHub:
To host image on GitHub
First create a public GitHub repository with the name of your choice.
Once done creating the repository, add image(s)/gif(s) via the .
After image uploading commit the changes and go back to the repository.
Now click on the image/gif that you want to set and this will take you the image/gif which is now hosted on GitHub.
After that right-click (mouse) on the image and then click on Open image in a new tab.
Finally, copy the URL/Link from the browser and paste into the appropriate CSS Variable described/shown earlier.
Congratulation! Now you know how to host images on GitHub.
This process not only applies to image/gif but also for virtually anything including fonts etc.
2. How to change/use another font(s)?
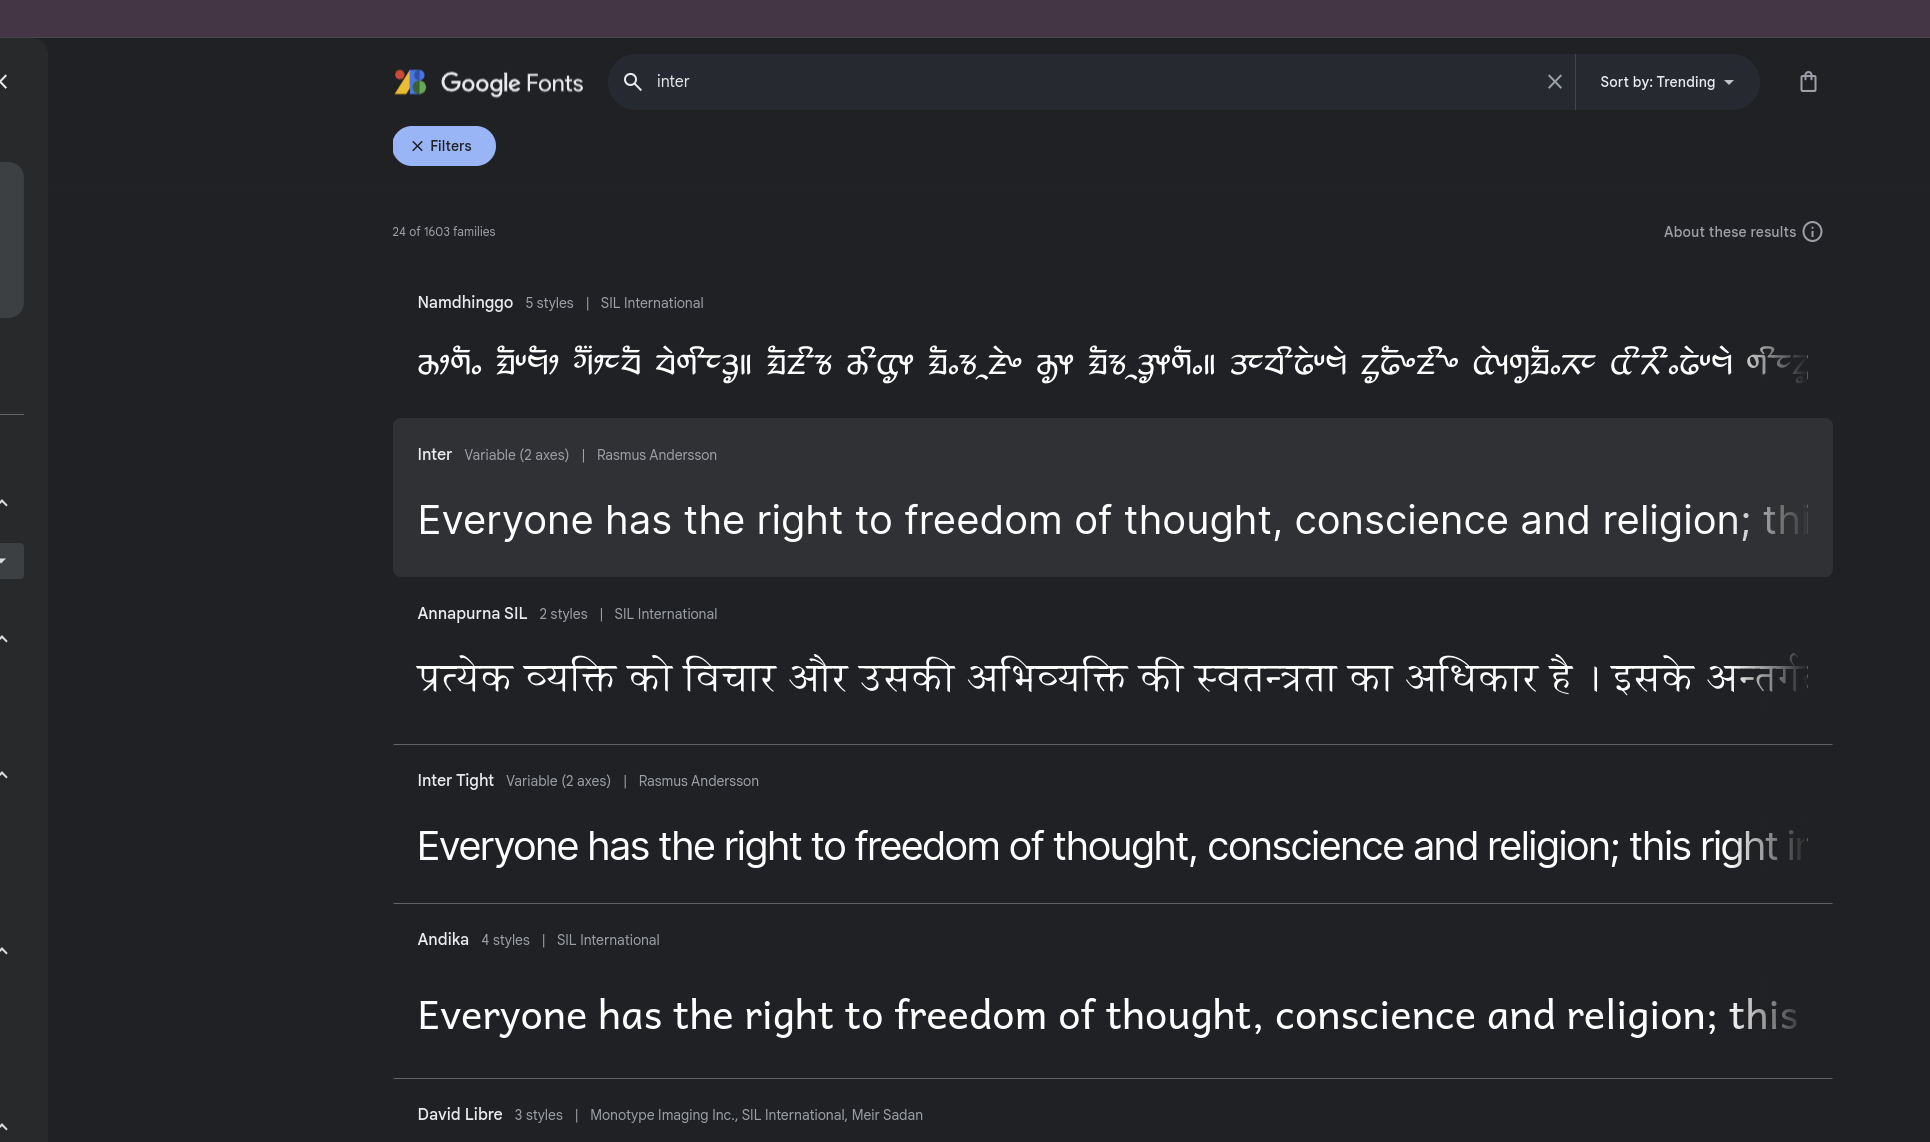
First, make sure that the font you are trying to use is already hosted somewhere if it is not already. Most of the time you will be using google fonts. From there, choose the font you are looking for and adjust all the settings and everything (font weights, size, etc.) and then copy the CSS import url. See the below screenshots:
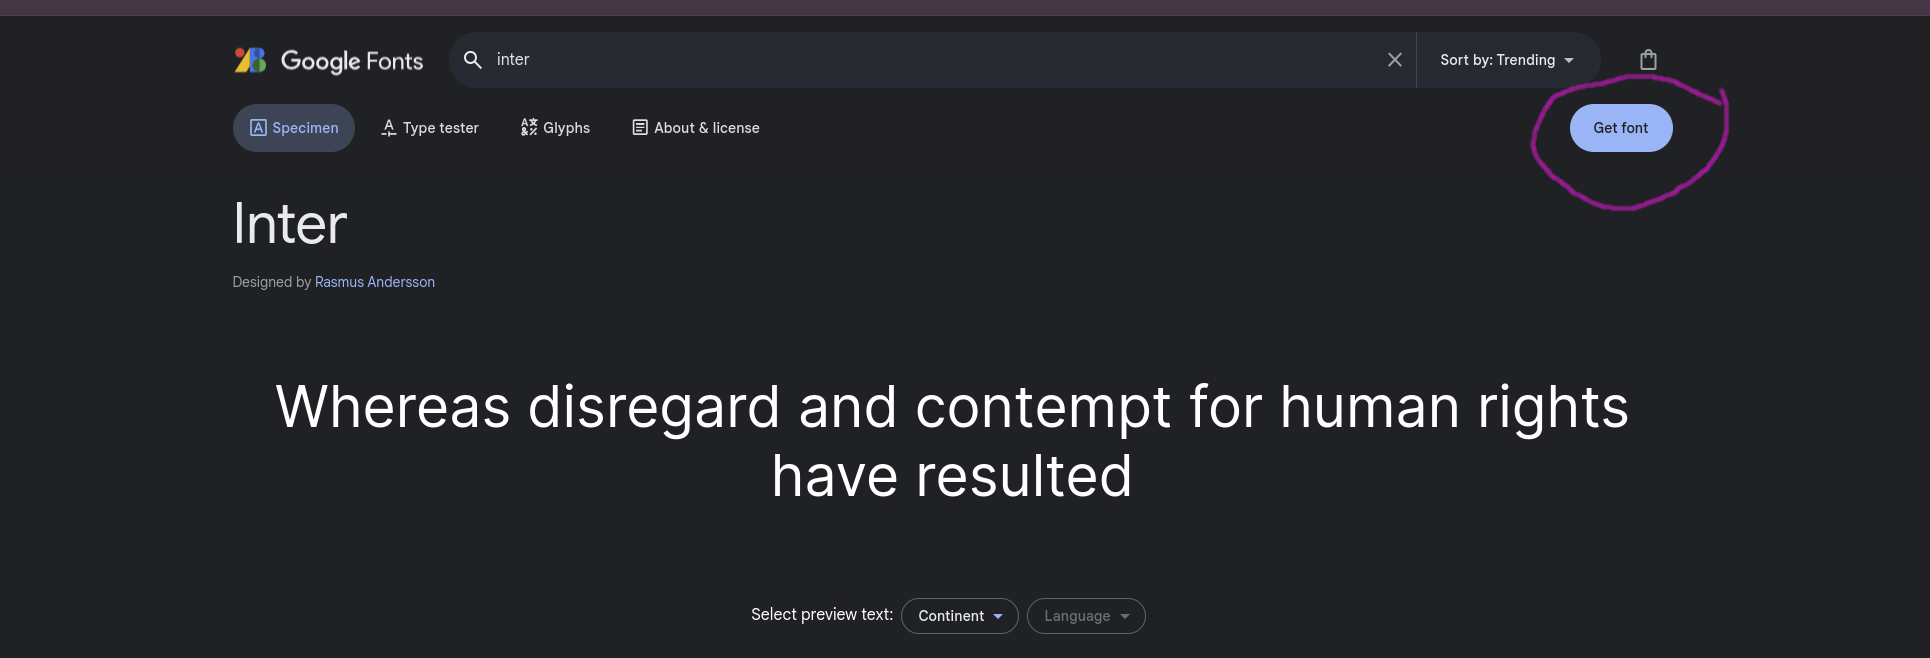
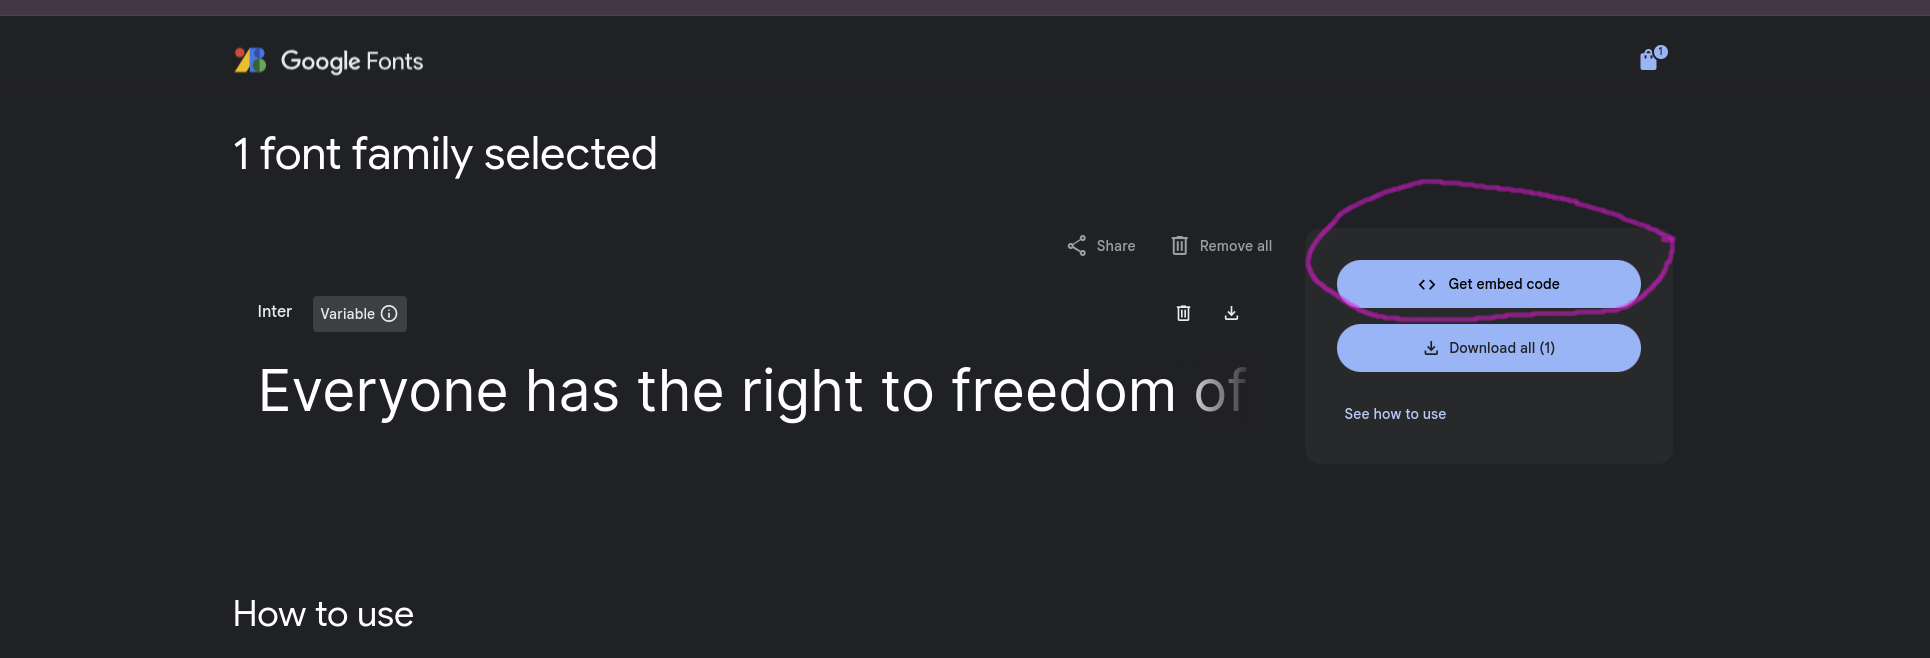
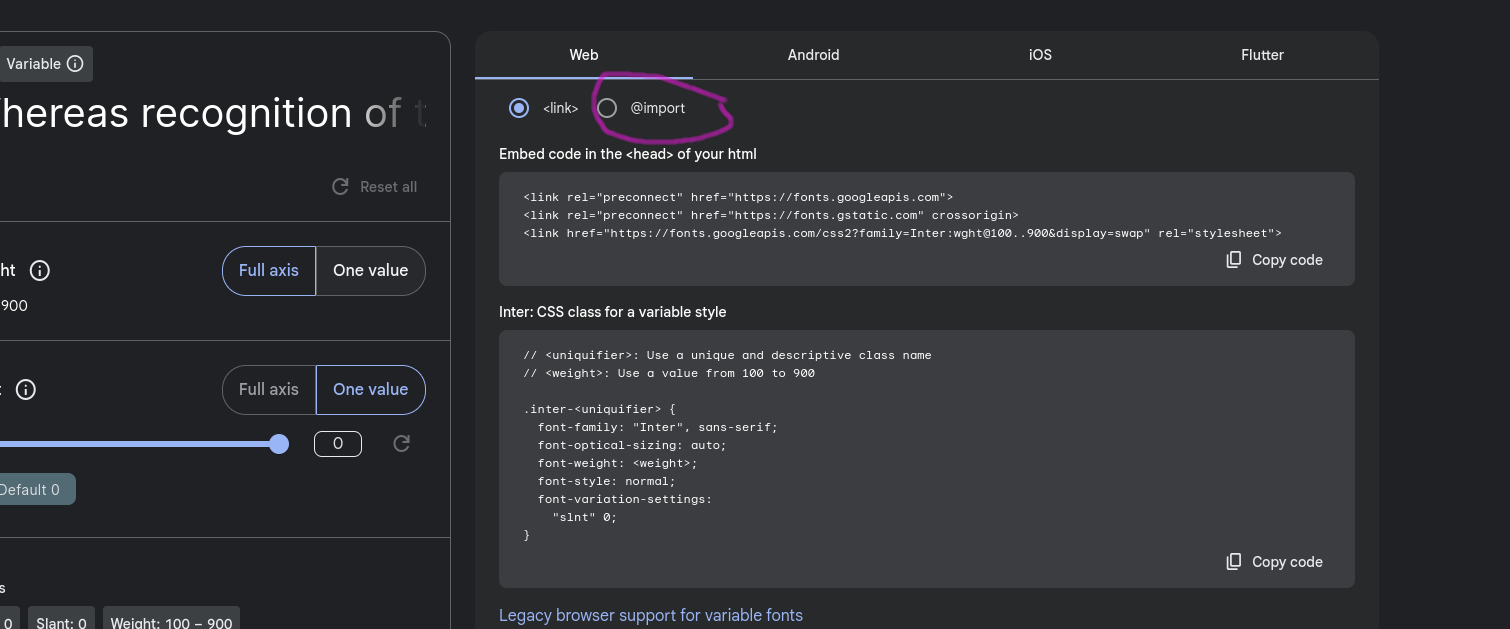
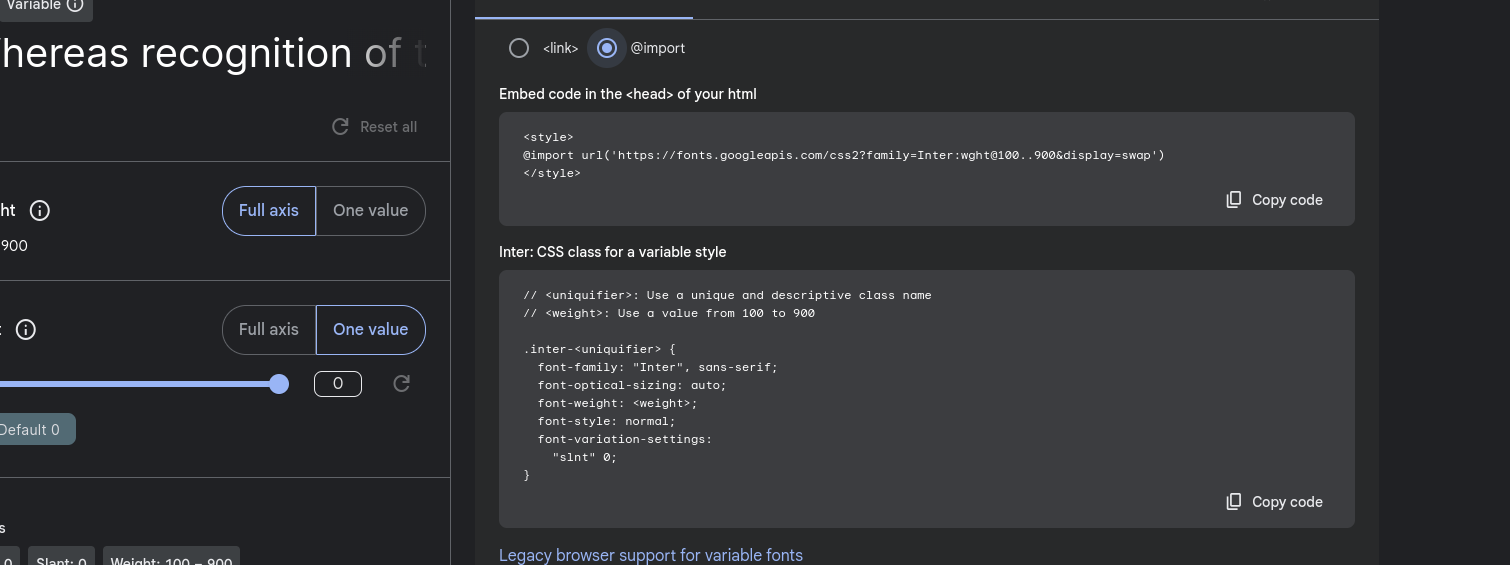
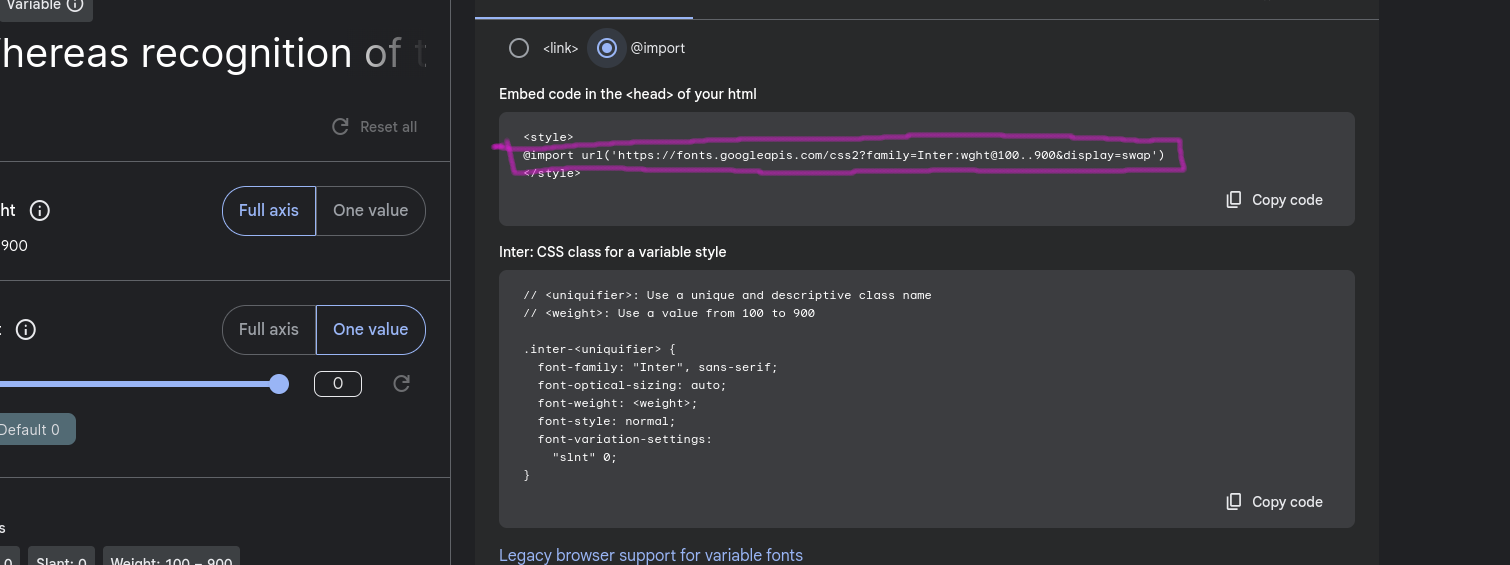
Only copy the highlighted part. In your case, the link can be different.
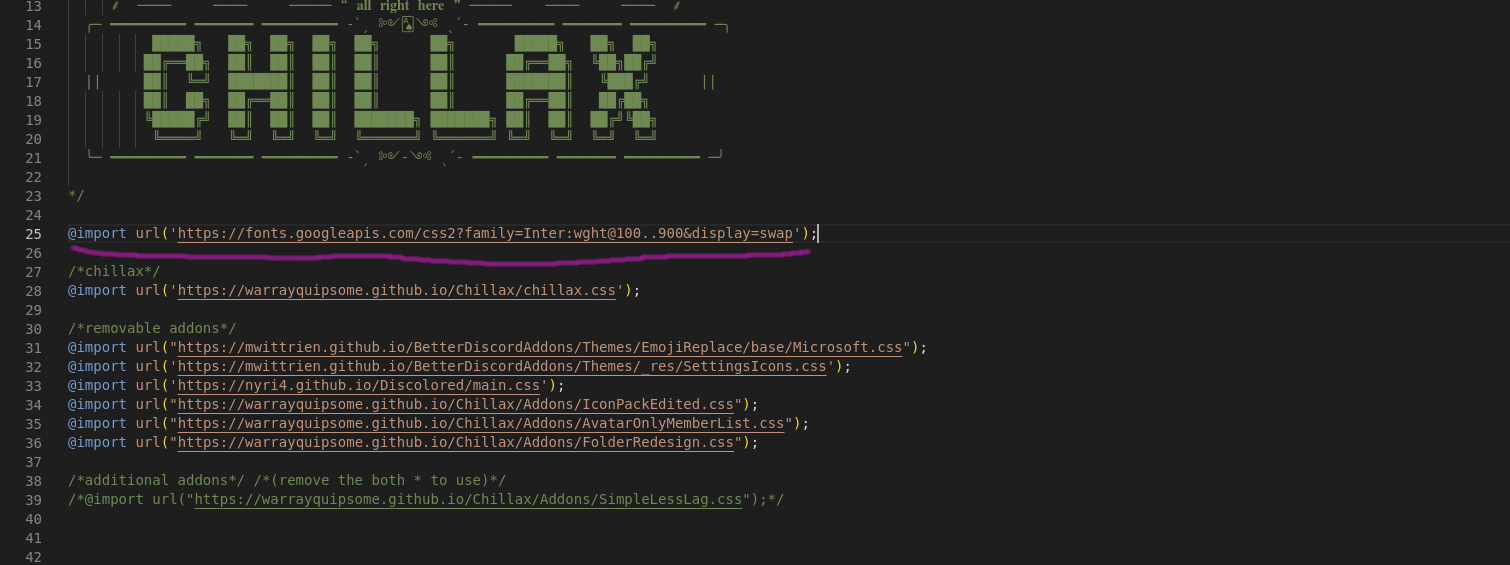
Now go to .
Paste the copied link at the top just like the above screenshot and put the
;at the end of it.

Now change the
--font-naneto the name of the font that you have just imported.Optionally adjust the
--font-sizeif you need to.
And now the new font(s) should be applied.
Alternatively, if you want to use a downloaded font:
Host the font somewhere. GitHub is a good place.
For GitHub, all you have to do is create a new repo and upload the font there.
The process on how to host a font on GitHub is very similar to the described procedure here.
After clicking on the font file, right-click (mouse) on the button located at the right corner and then click button. Finally, copy RAW GitHub URL/Link.
Now just like in the previous Step 7, we import the font, but this time use the RAW GitHub link instead of the Google font approach. See the below for comparison:
instead, it will be
3. How to change the font size?
Go to .
Find the CSS Variable
--font-sizeand change it to your needs.
That's it.
4. How to change the accent color (The Below RED thing/part see attached screenshot)?

Go to .
Find the CSS Variables
--accentcolor,--accentcolor2and change them to your needs.You may want to play around with them to find the right balance.
5. How to change the theme welcome username?
Go to .
Find the CSS Variables
--user-nameand change it.
6. How to make it so that desktop wallpaper/wallpaper engine's wallpaper is visible through?
However, if you have decided to make up your mind, then
Go to and turn it on.
Now and remove the
--wallpaperCSS Variable mentioned in here.Your window should now be
transparentorsee throughetc.Now you may want to add a bit of blur to make things readable in the
container__037ed. However, discord uses electron, and we have found it to work differently on different OS, and the window manager of your OS also plays a vital role here. So, the below CSS snippet may or may not work properly (Translucence is enabled in window manager level). In case it does not work, it will at least make thecontainer__037edbasically that region a bit darker..container__037ed { background-color: rgba(255, 255, 255, 0) !important; /* Semi-transparent white for light theme */ /* Or use this for dark theme: background-color: rgba(0, 0, 0, 0.1); */ backdrop-filter: blur(1px) !important; /*Blur the background*/ border-radius: 10px; /* Rounded corners */ /* Or use this for dark theme: border: 1px solid rgba(0, 0, 0, 0.2); */ box-shadow: 0 8px 32px 0 rgba(31, 38, 135, 0.37) !important; /* Optional: Add a box shadow for depth */ }
7. How to change the font of the group chat?
We have already mentioned how you can import a custom font and use it here.
Now, the steps are first
Settings, then go to theThemesSection and thenEdit Quick CSS.After that, find the CSS variable
--group-chat-fontand provide the font name that you like to use within" "(double quote).Make sure that the font that you are trying to set is available in the theme context.
8. CHILLAX is laggy or slow, very slow, any fix?
Make sure that Hardware Acceleration is on. If not, then turn it on.
The steps are first
Settings, thenAdvanceand then turn onHardware Acceleration.
Almost 99% of the time this is the reason behind lag.
If you are on a system that is not older than eight or nine years, the theme should work fine without any lag.
However, as a last resort you can
The steps are first
Settings, then go to theThemesSection and thenEdit Quick CSS.Uncomment line
37different/or which says/*@import url("https://warrayquipsome.github.io/Chillax/Addons/SimpleLessLag.css");*/See the below screenshots:

Uncomment this line, and it should look something like the below screenshot:

This should make it a little less laggy.
Consequently, you can try out OpenAsar which is part of the Vencord installer. This should make Discord a bit more performant, reducing the lag by a bit.
9. How to make the member list always stay visible instead of on hover?
This is basically an addon; to remove it:
The steps are first
Settings, then go to theThemesSection and thenEdit Quick CSS.Remove or comment out the line (currently line number
33and maybe different in your case) containing@import url("https://warrayquipsome.github.io/Chillax/Addons/AvatarOnlyMemberList.css");. Now the member list will always be visible instead of on hover. See the below screenshots:

Now remove/comment out this line.

Finally, you should have something like this:

10. How to get back the old emojis?
This is also very similar to the previous FAQ. This thing is also an addon. Remove it to get back default emojis:
The steps are first
Settings, then go to theThemesSection and thenEdit Quick CSS.Remove or comment out the line (currently line number
27and maybe different in your case) containing@import url("https://mwittrien.github.io/BetterDiscordAddons/Themes/EmojiReplace/base/Microsoft.css");.Now you should have the old emojis.
11. How to get rid of the Folder Icons and Make it like the old discord?
The steps are first
Settings, then go to theThemesSection and thenEdit Quick CSS.Remove or comment out the line (currently line number
32and maybe different in your case) containing@import url("https://warrayquipsome.github.io/Chillax/Addons/FolderRedesign.css");.Now it should be normal like the old Discord.
12. How to get rid of the Radial Status/Ring around the user profile picture/image?
The steps are first
Settings, then go to theThemesSection and thenEdit Quick CSS.Remove or comment out the line (currently line number
33and maybe different in your case) containing@import url("https://discordstyles.github.io/RadialStatus/dist/RadialStatus.css");.
Now, it should be similar to the default discord style with slight drop shadow around the transparent images.
13. How to get rid of the Friend Grid?
The steps are first
Settings, then go to theThemesSection and thenEdit Quick CSS.Remove or comment out the line (currently line number
34and maybe different in your case) containing@import url("https://warrayquipsome.github.io/Chillax/Addons/FriendGrid.css");.
Now the friend grid should be similar to the default Discord.
14. How to get rid of the below-attached ugly thing?
The steps are first
Settings, then go to theThemesSection and thenEdit Quick CSS.Now use/paste the below CSS snippet for the respective mode(Dark/Light) at the very end of the
Edit Quick CSS:
Now it should be a bit better.
15. How to use Dark/Light mode in Chillax Theme?
You can enable Dark or Light mode from the Discord Settings. Steps are:
Now go to
Settings>Appearance.Finally, choose either Light mode or Dark mode based on your preference, and Chillax will reflect that.
16. After applying the Chillax theme, it looks funny and/or transparent/see through background is missing, what to do?
Before applying the theme:
Firstly, make sure that there is no custom CSS or CSS snippet(s) is/are running.
Secondly, make sure that no party plugin or any plugins in general related to theming are running (if debugging, disable all plugins for quicker conclusion).
Thirdly,
Settings>Appearanceis set to either Dark or light mode.Now apply the Latest version of Chillax.
Now you should have Chillax with the default look and feel.
17. How to get rid of the mobile icon beside the avatar?
The steps are first
Settings, then go to theThemesSection and thenEdit Quick CSS.Now go to the line
95or find the line that says--rs-phone-visible: block;and change this line to the below line:--rs-phone-visible: none;Now mobile icon or phone icon should be gone.
18. How to change the color of urls/links?
The steps are first
Settings, then go to theThemesSection and thenEdit Quick CSS.Now apply the below CSS snippet, which will change the color of every url to the color of your choice.
19. How to change the input placeholder value from " Life is so much easier when you just take a moment to chill " to something that I want?
The steps are first
Settings, then go to theThemesSection and thenEdit Quick CSS.Now find the CSS variables
--chillax-input-fieldand--chillax-input-field-locked.Change them according to what you like most.
20. How to change the Avatar Only Member list's rounder corner/border radius?
The steps are first
Settings, then go to theThemesSection and thenEdit Quick CSS.Now find the CSS variable
--memberlist-border-radiusand change the pixel as per your preference.If you don't like the border radius and want it to be a rectangle, set the value to
0px.
21. How to change the typing indicator text?
The steps are first
Settings, then go to theThemesSection and thenEdit Quick CSS.Now find the CSS variables
--chillax-input-typing-indicator-one-personand--chillax-input-typing-indicator-many-person.Change them according to what you like most.
22. How to get back the scroll wheel/scroller/scrollbar in CHILLAX?
The steps are first
Settings, then go to theThemesSection and thenEdit Quick CSS.Now find the CSS variable
--chillax-scroller-colorwhich is by default set totransparent.Change it to a hex color of your choice, and the scrollbar/scroll wheel should appear.
Still Have Question(s)?
Join our support Discord Server and ask for help and do not be shy.
